Click here for English version.
들어가기 전에
맥에서 Docker는 네이티브로 돌아가지 않습니다. Docker Desktop on Mac는 Apple이 만든 Hypervisor.framework를 이용해 alpinelinux를 가상머신 위에 띄운 후 remote로 접속하는 방식으로 동작합니다. 즉, 여기서 안내하는 방식은 실제 Docker Desktop on Mac이 동작하는 방식과 거의 유사한 방식입니다 (참고: mac과의 bridge network 및 volume 사용에는 제한이 있습니다.) 참고로 Docker 자체는 Dockerd(dockerd -> runc)에 접속하는 클라이언트 CLI에 불과합니다. 도커의 작동 원리는 Docker(container)의 작동 원리: namespaces and groups 글을 참고하시면 됩니다.
글이 너무 길어지면 스크롤 하기도 귀찮아지고, 끝까지 따라하기도 귀찮아지는 것을 알기에 짧게 작성합니다.
Docker 클라이언트 바이너리 설치하기
Ubuntu Linux (ARM64) VM 띄우기
우선 Downloads폴더에서 작업하는 것으로 간주합니다.
시작을 위해 다음 파일을 미리 받습니다:
(참고: qemu-img는 제가 x86_64 homebrew로 직접 설치한 후 추출한 파일입니다.)
- kernel: https://cloud-images.ubuntu.com/releases/focal/release/unpacked/ubuntu-20.04-server-cloudimg-arm64-vmlinuz-generic
- initrd: https://cloud-images.ubuntu.com/releases/focal/release/unpacked/ubuntu-20.04-server-cloudimg-arm64-initrd-generic
- disk image: https://cloud-images.ubuntu.com/releases/focal/release/ubuntu-20.04-server-cloudimg-arm64.tar.gz
- qemu-img (미리 빌드된 바이너리): https://drive.google.com/file/d/1vGsANcOV123TOQQKFwzSwqyDelDy0pRG/view?usp=sharing
-- 터미널 1
$ mv ubuntu-20.04-server-cloudimg-arm64-vmlinuz-generic vmlinux.gz
$ gunzip vmlinux.gz
$ rm vmlinux.gz
$ mv ubuntu-20.04-server-cloudimg-arm64-initrd-generic initrd
$ tar zxvf ubuntu-20.04-server-cloudimg-arm64.tar.gz
$ mv focal-server-cloudimg-arm64.img disk.img
$ git clone https://github.com/evansm7/vftool.git
$ cd vftool && xcodebuild
$ cp ./build/Release/vftool vftoolcli

# cloudimg의 기본 디스크 크기가 2GB이기 때문에 디스크 크기를 넉넉히 늘려줍니다. 원하는 만큼 추가하시면 됩니다. 저는 여기서 60GB를 추가했습니다:
$ DYLD_LIBRARY_PATH=~/Downloads/qemu-img-x86_64 ~/Downloads/qemu-img-x86_64/qemu-img resize disk.img +60G
$ ./vftoolcli -k vmlinuz -i initrd -d disk.iso -m 4096  -a "console=hvc0"
...
# 이 부분에 /dev/ttysXXX 가 나옵니다.

-- 터미널 2
$ screen /dev/ttysXXX
위 과정대로 하면 터미널 2에 initramfs prompt가 뜹니다. 다음과 같이 진행합니다:
mkdir /mnt
mount /dev/vda /mnt
chroot /mnt
touch /etc/cloud/cloud-init.disabled
echo 'root:root' | chpasswd
ssh-keygen -f /etc/ssh/ssh_host_rsa_key -N '' -t rsa
ssh-keygen -f /etc/ssh/ssh_host_dsa_key -N '' -t dsa
ssh-keygen -f /etc/ssh/ssh_host_ed25519_key -N '' -t ed25519
cat <<EOF > /etc/netplan/01-dhcp.yaml
network:
    renderer: networkd
    ethernets:
        enp0s1:
            dhcp4: true
    version: 2
EOF
exit
umount /dev/vda
이제 터미널 1에서 Ctrl + C 로 VM을 종료 한 후 다음 명령어를 이용해 VM을 다시 실행합니다:
$ ./vftoolcli -k vmlinuz -i initrd -d focal-desktop-arm64.iso -m 4096 -a "console=hvc0 root=/dev/vda"이후 터미널2에서 screen 명령어를 이용해 다시 부팅 & 콘솔에 접속한 후 다음과 같이 진행합니다:
Ubuntu 20.04.1 LTS ubuntu hvc0
ubuntu login: root
Password: root
Welcome to Ubuntu 20.04.1 LTS (GNU/Linux 5.4.0-54-generic aarch64)
* Documentation: https://help.ubuntu.com
* Management: https://landscape.canonical.com
* Support: https://ubuntu.com/advantage
System information as of Mon Nov 30 08:59:18 UTC 2020
System load: 0.08 Processes: 100
Usage of /: 95.8% of 1.23GB Users logged in: 0
Memory usage: 4% IPv4 address for enp0s1: 192.168.64.7
Swap usage: 0%
=> / is using 95.8% of 1.23GB
0 updates can be installed immediately.
0 of these updates are security updates.
Last login: Wed Apr 1 17:24:06 UTC 2020 on hvc0
$ resize2fs /dev/vda
$ passwd
$ apt update
$ apt install apt-transport-https ca-certificates curl gnupg-agent software-properties-common -y
$ curl -fsSL https://download.docker.com/linux/ubuntu/gpg | apt-key add -
$ add-apt-repository \
"deb [arch=arm64] https://download.docker.com/linux/ubuntu \
$(lsb_release -cs) \
stable"
$ apt-get update
$ apt-get install docker-ce docker-ce-cli containerd.io -y
$ sh -c "cat <<EOF > /etc/docker/daemon.json
{
\"hosts\": [\"tcp://0.0.0.0:2375\", \"unix:///var/run/docker.sock\"],
\"storage-driver\": \"vfs\"
}
EOF"
$ sed -i 's/ -H fd:\/\///g' /lib/systemd/system/docker.service
$ systemctl daemon-reload
$ systemctl restart docker
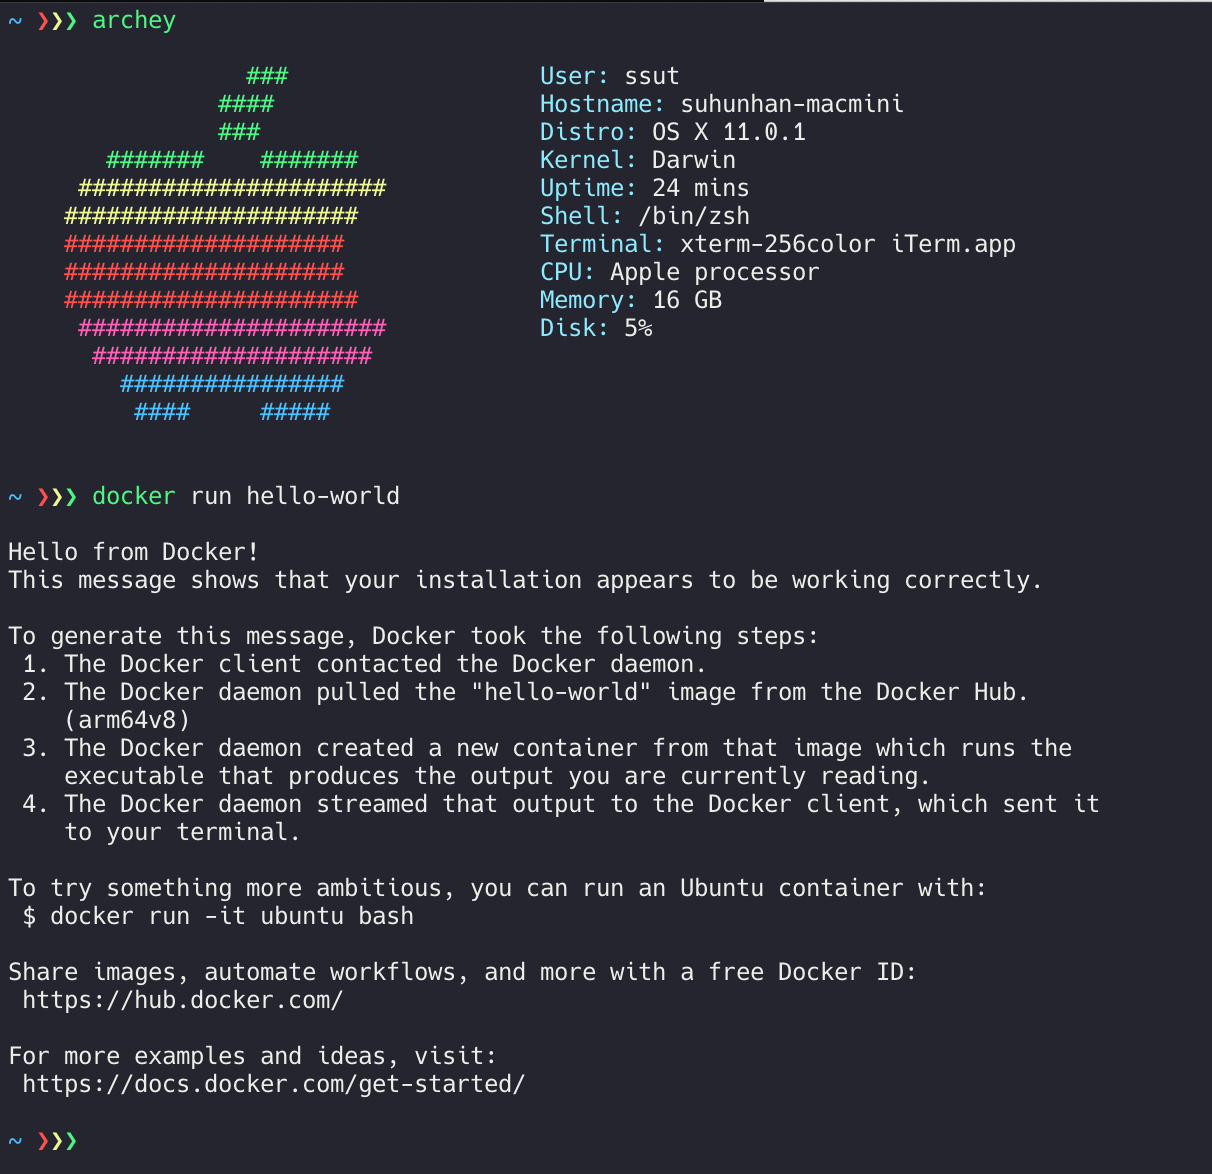
$ docker run hello-world
$ 도커가 잘 실행되는지 확인합니다.
$ apt install openssh-server net-tools -y
$ ip a | grep 192.168
inet 192.168.64.2/24 brd 192.168.64.255 scope global dynamic noprefixroute enp0s1
$ 아이피를 확인합니다.
이제 맥에서 다음 명령어를 입력해 docker daemon에 잘 붙는지 확인합니다:
$ DOCKER_HOST=192.168.64.xxx docker run hello-world
# 도커가 잘 실행되는지 확인합니다.
잘 동작한다면 export DOCKER_HOST=192.168.64.xxx 로 환경 변수를 등록해두고 도커를 사용하시면 됩니다. (참고: 재부팅 등의 이유로 다시 실행하고 싶은 경우 vftool 로 VM 실행 + IP 확인 + DOCKER_HOST 설정만 하시면 됩니다.)
끝.